
Pumpkin guts and all – we’re here for it.
‘Tis the season to be spooky. It’s that time of year when the leaves get crispier, the nights grow eerier, and the haunts get scarier – it’s the Halloween season.
Here at Chaco, we are big believers that pumpkin carving is an activity everyone should experience during Halloween. From the moment you find the perfect pumpkin at the patch (or your local grocery store) to that kinda gross but kinda cool feeling of sticking your hands into the stringy and slimy abyss – nothing beats the pride, joy, and fun of carving your own jack-o-lantern.
The carving process takes some preparation, planning, and a healthy dose of creative thinking and imagination. To help you make your own jack-o-lantern, we’ve created a 7-step guide to carving the perfect pumpkin – plus, click here to download our Chaco Pumpkin Carving Stencils:
- Find your pumpkin
No matter if you pick up a classic orange pumpkin at the grocery store around the corner or hand-select your own at a local pumpkin patch, nothing beats that feeling of pride when standing back and admiring your glowing jack-o-lantern.
We recommend snagging a pumpkin that has a long and sturdy stem. Not only does this make carrying your pumpkin back to your house easier, but it also gives your pumpkin some extra character too. Pumpkins with a large “face” or front to them also make a great jack-o-lantern. And for kids, consider picking up a few pie pumpkins, which are much smaller and easier to cut into.
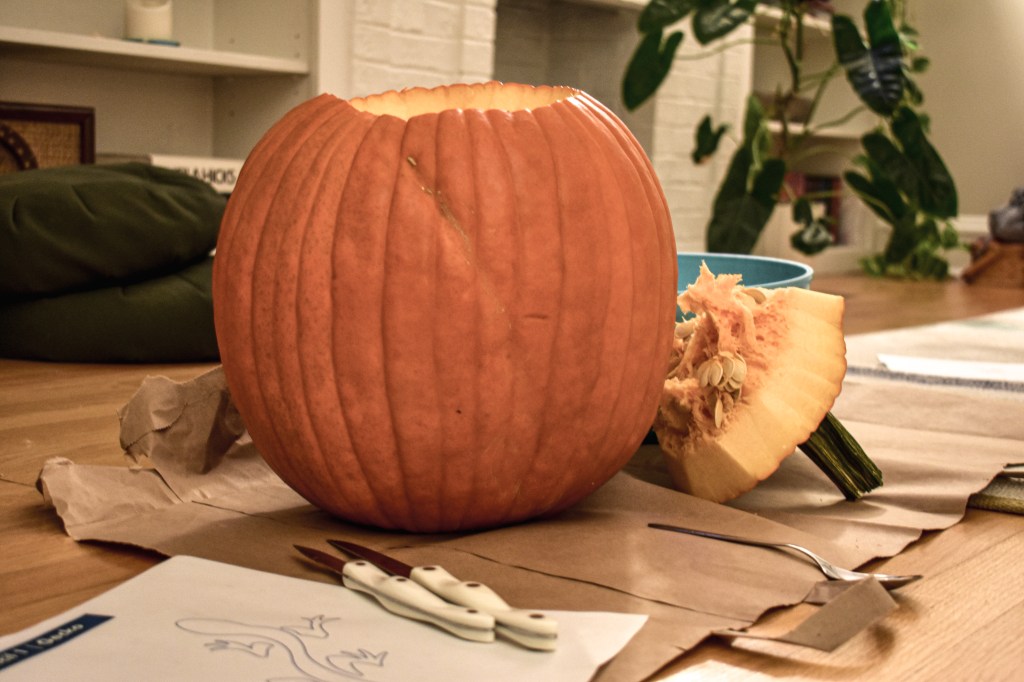
- Get the right tools
Sure, you can splurge on a fancy pumpkin carving kit that includes serrated knives, a spoon, a stencil tracer, a marker, and much more. But chances are you have access to all of these things in your very own kitchen.
At the very minimum, gather up the following items to make your pumpkin carving experience easy:
- Large knife – to remove the top of the pumpkin
- Small knife – to carve finer details
- Large metal spoon – to scoop the pumpkin guts
- Large bowl – to separate your seeds
- Trash bag – to discard unwanted pumpkin scraps
- Newspaper – to keep your work area clean
- Marker – to stencil or draw your own design
- Remove the pumpkin guts
Some folks despise it, others love it, and we all have to do it. Scooping out the insides of the pumpkin is a messy and necessary step in the pumpkin carving process. Before getting started, make sure you have your heavy-duty spoon ready. It’s best to use a sturdy, metal serving spoon to scrape out the pulp. That way, your spoon won’t bend and you’re able to cover more surface area inside as you scrape.
Scrape as much pulp as you can from the inside of the walls before removing the pumpkin guts. As you go, set your seeds aside in a bowl – separating and removing as much pulp as you can from the individual seeds.
Newspaper comes in handy under your pumpkin to avoid making a mess. It can also double as your drawing board when you’re ready to move on to the stenciling process.
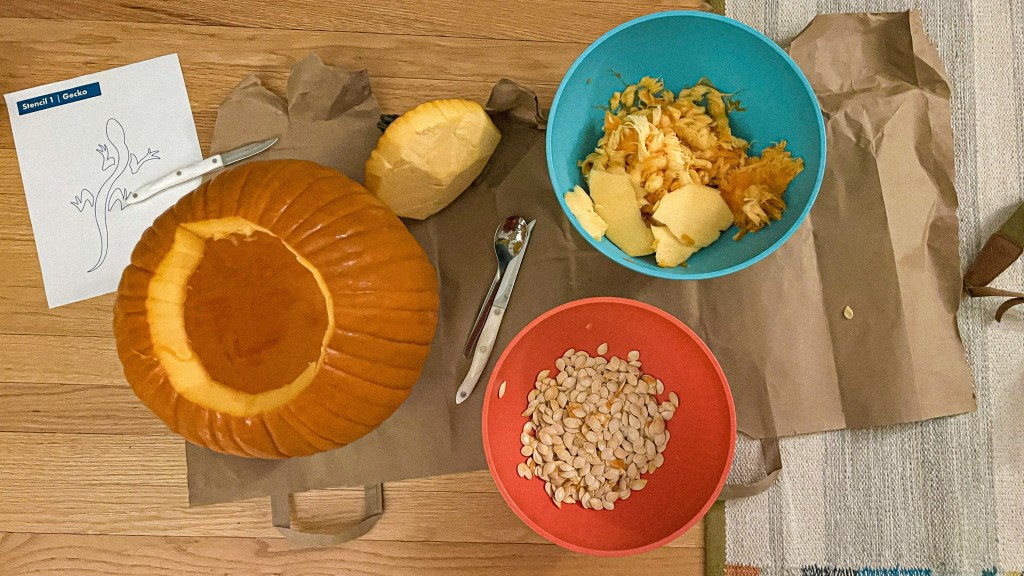
- Choose a stencil
There are literally endless options when it comes to choosing a stencil for your pumpkin. Carving can be as creative or straightforward as you’d like it to be.
Looking for a classic Halloween look? Try a traditional jack-o-lantern face.
Love spooky Halloween characters? Create a movie-inspired stencil.
Huge Chaco fan? Well, try a Chaco-inspired stencil this year. Download one (or all) of these custom Chaco stencils here:
- Stencil 1: Gecko
- Stencil 2: Z/Sandal
- Stencil 3: Chaco Logo
- Stencil 4: Fit for Adventure
Pro tip: Don’t have a printer to print out the stencils? Use a computer screen as a lightbox to trace the Chaco stencils (or other stencils of your choice) onto a blank sheet of paper!
- Get carvin’
Now comes the fun part: carving your pumpkin. The carving experience is as simple as following the traced lines on your pumpkin with a serrated or super-sharp knife. If you’re carving a classic jack-o-lantern face, we recommend starting with the eyes and moving down from there. For other stencils, carve the larger pieces first before moving on to the finer details. Or, if you’ve chosen to forgo the stencil process, create your own eyes, mouth, or shapes as you go.
- Separate and bake your seeds
The beauty of pumpkin seeds is that you can flavor them any way you’d like. Personally, we’re big fans of classic salted seeds, Caribbean jerk-seasoned seeds, and spicy Old Bay roasted seeds. You can find tons of recipes out there (like this one and this one) to make sure the seeds are prepped correctly and turn out crispy enough for your liking.
Pro tip: Soak your seeds in salt water overnight. This step helps remove the natural enzymes on the seed, which makes them easier to chew and digest.
- Light it up
The last step in any pumpkin carving endeavor is to light up your jack-o-lantern. There are plenty of candles you can use inside a pumpkin. For starters, regular tea lights work great. They’re small, cheap, and easily fit inside your pumpkin. Or, if you’re worried about having a live flame inside your pumpkin, opt for a flameless candle option, like these flickering battery-powered tea lights.
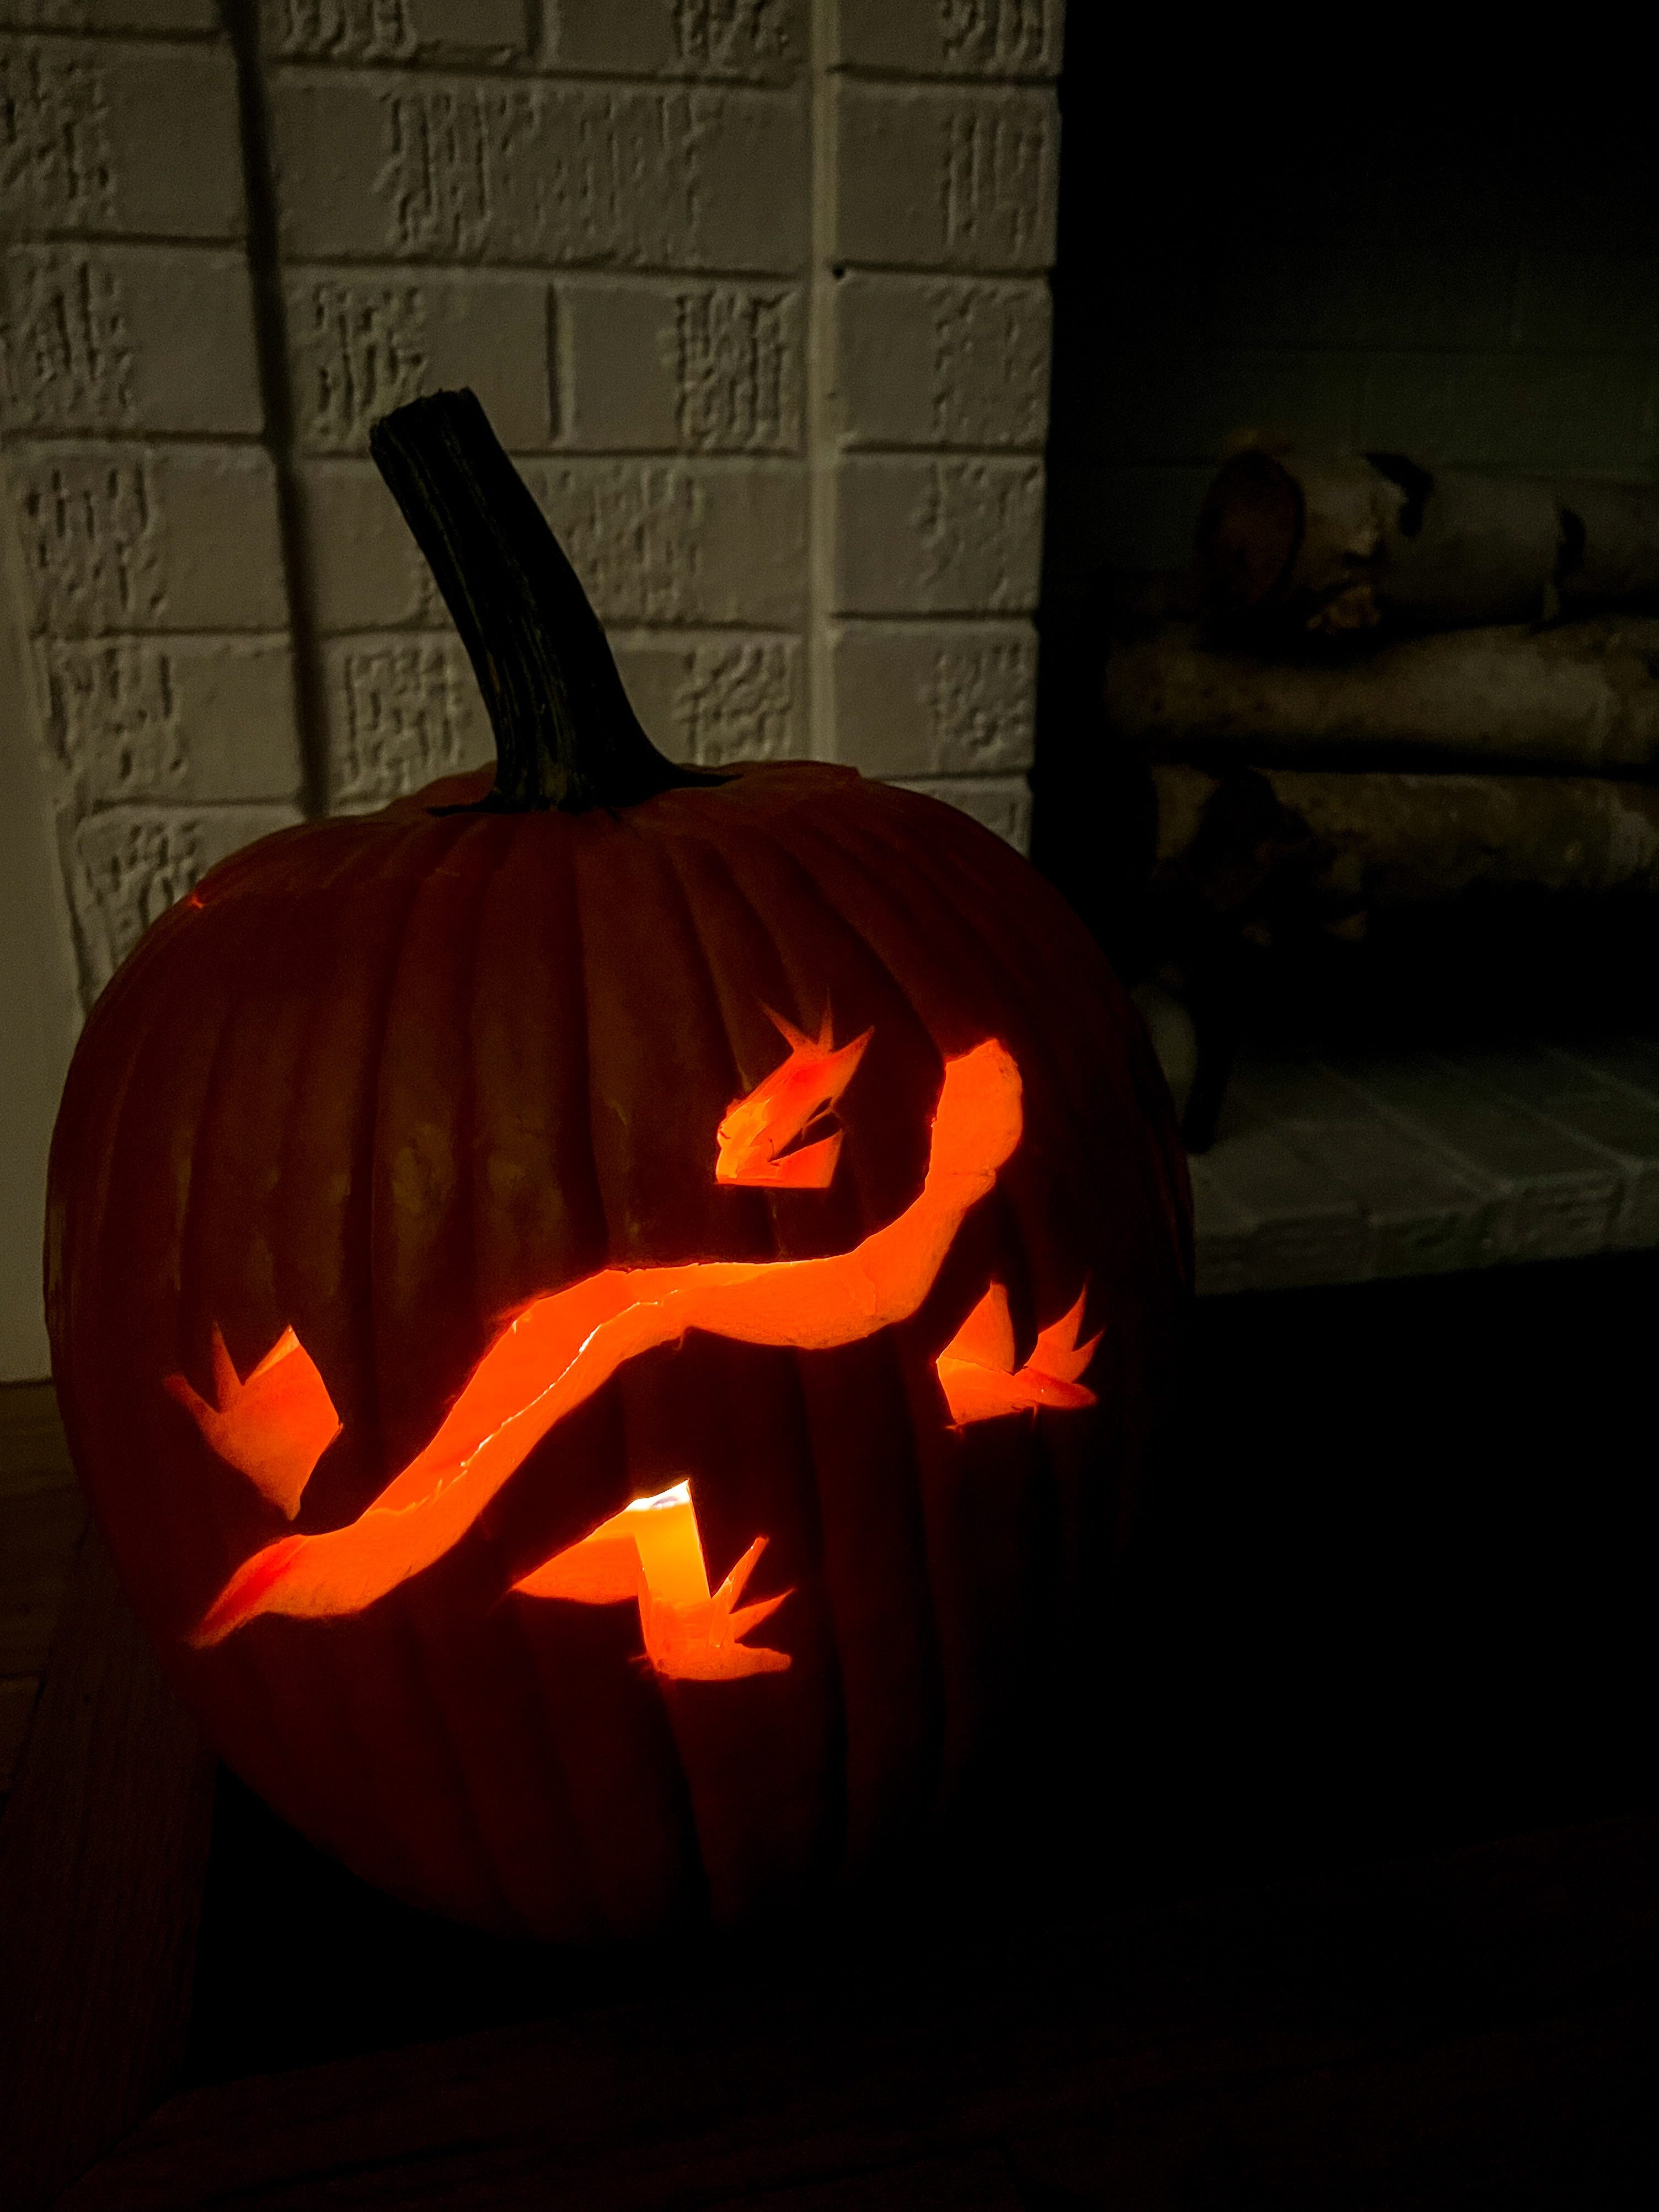
Finally, set your pumpkin on the front porch and admire your spooky and satisfying work.
Happy haunting (and adventuring)!
